Saturday, 30 March 2013

Cake Decorating


The Icing is In


One of the best ways to brighten up a cake is to decorate and personalize it yourself. What is better than having someone slave over a cake just for you...? The fact that you didn;t have to do it yourself. Well now its time to return the favour, and return the flavour.

I find the best icing is Betty Crocker premade icing. Using pre-made icing allows you to know how it will taste and how it is to work with. Other icing that you use made from scracth often come out to liquidy, not spreadable, etc.


*When filling your piping bag with the icing put the bag in a cup, thus allowing you to put the icing in without holding the bag*


Here is a site with great step by step ways of icing, with tips to get the best results!


Get inspired

Sunday, 24 March 2013

Blueberry Blast Tart

Ingredients

For the Crust

1 1/4 cups all-purpose flour
1/3 cup sugar
1/4 teaspoon salt
1/2 cup cold unsalted butter, cut into small pieces


For the Filling

6 cups fresh blueberries, rinsed and dried
2 tablespoons cornstarch
2 teaspoons finely grated lemon zest
3 tablespoon fresh lemon juice
2/3 cup sugar
Pinch of salt

Directions


1.Preheat oven to 375 degrees. In a food processor, combine flour, sugar, salt, and butter; process until large moist crumbs form (dough should hold together when squeezed).
  1. Transfer dough to a 9-inch round tart pan with a removable bottom; with floured fingers, press evenly into bottom and up sides. Freeze until firm, about 15 minutes; prick bottom of dough all over with a fork. Bake until golden, 20 to 25 minutes; cool completely.
  2. Meanwhile, reserve 1 cup of the prettiest berries for topping. In a medium saucepan, bring 1/4 cup water and 1 1/2 cups berries to a boil over high heat. Reduce heat; simmer, stirring occasionally, until berries begin to break down, 3 to 4 minutes.
  3. In a small bowl, mix cornstarch with 2 tablespoons water; stir into berries in pan. Add lemon zest and juice, sugar, and salt. Bring to a boil; reduce heat. Simmer, stirring, just until mixture begins to thicken, 30 to 60 seconds. Remove from heat. Stir in remaining 3 1/2 cups fresh berries. Immediately pour hot berry mixture into cooled tart shell, and smooth with a spatula.
  4. Scatter reserved berries on top, pressing down lightly to help them adhere. Refrigerate until cool, about 30 minutes and up to overnight.

Wednesday, 20 March 2013

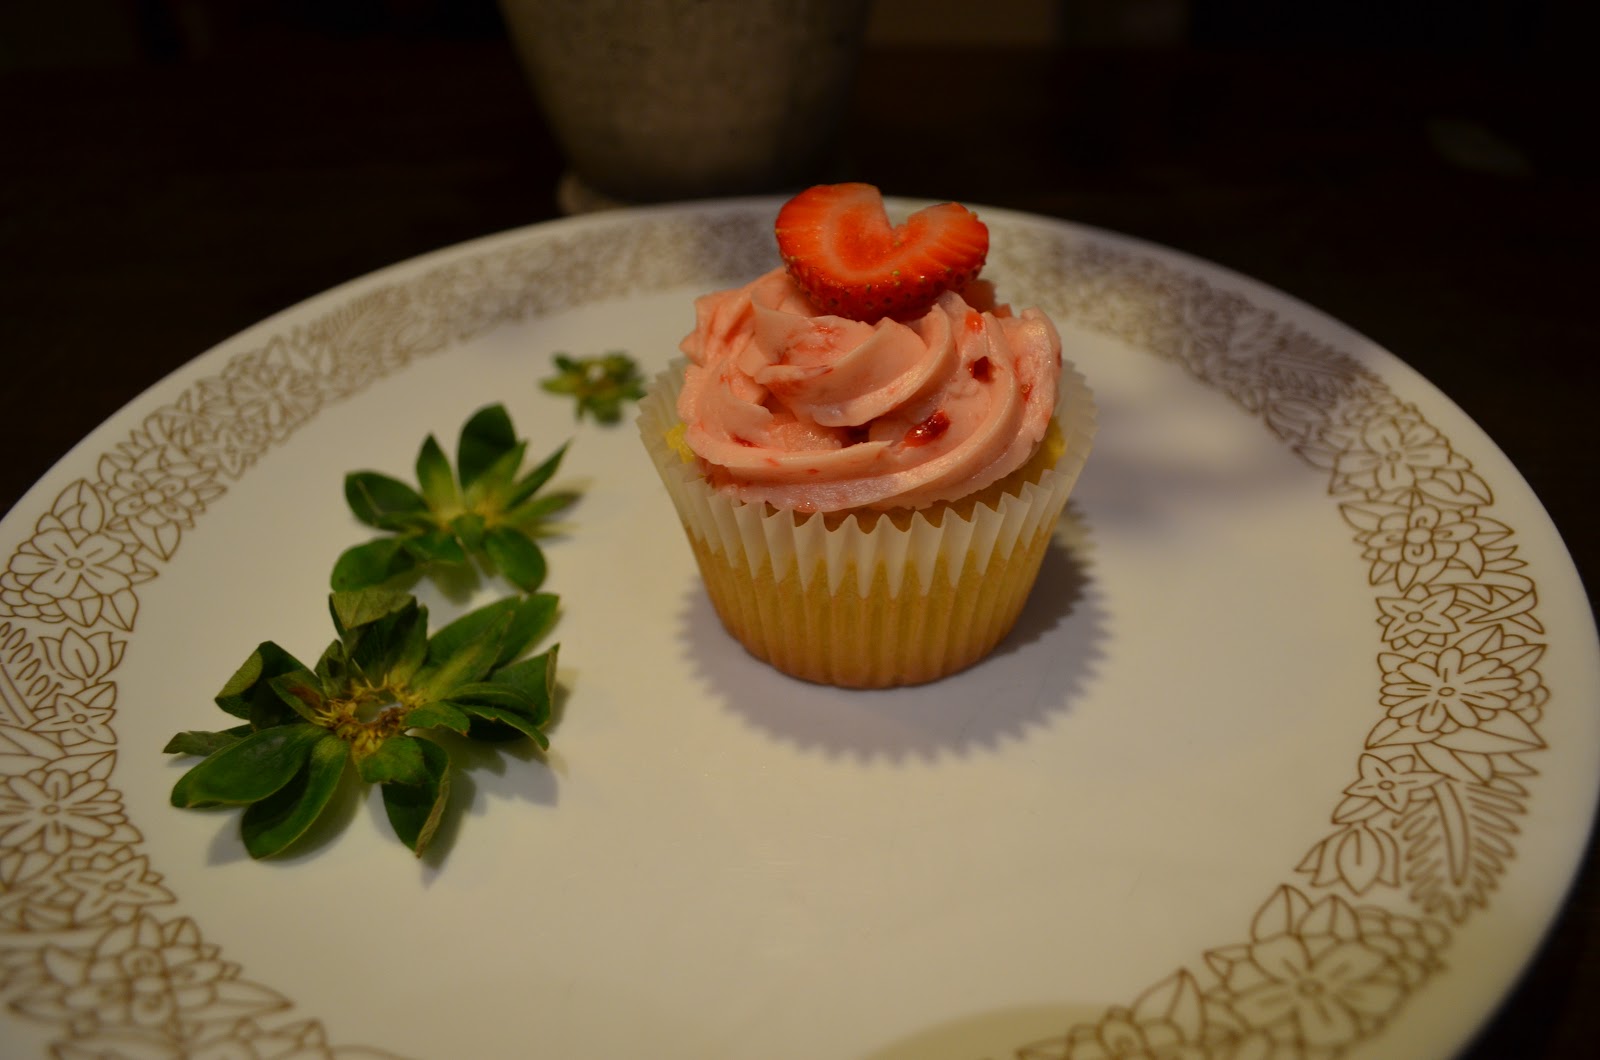
Strawberry Shortcake Cupcakes


Ingredients

1 cup all-purpose flour
2 Tbsp cornstarch
1 1/4 tsp baking powder
1/4 tsp salt
3/4 cup granulated sugar
2 large eggs, at room temperature
1 1/4 tsp vanilla extract
1/4 cup butter, melted and cooled slightly
1/4 cup vegetable oil
1/2 cup whole milk, at room temperature
   

    Directions
Preheat oven to 350 degrees. In a mixing bowl, whisk together flour, cornstarch, baking powder and salt for 30 seconds, set aside. In a separate large mixing bowl, using an electric hand mixer set on medium-high speed, whip together eggs, sugar and vanilla until mixture is very pale, fluffy and thickened slightly, about 3 minutes. Mix in melted butter and vegetable oil. Working in three separate batches, beginning and ending with flour, add 1/3 of the flour mixture followed by 1/2 of the milk mixture, blending until well combine after each addition. Pour batter into 12 paper lined muffin cups, filling each cup 2/3 full. Bake in preheated oven 19 - 22 minutes, until toothpick inserted into center of cupcake comes out clean. Cool completely on a wire rack, then frost with Strawberry Buttercream Frosting and top with a small whole fresh strawberry or fresh strawberry slices.
*To bring the eggs to room temp quickly, simply submerge in a bowl of warm water for 5 - 10 minutes. To bring milk to room temperature quickly, simply heat in microwave on high powder in a microwave safe dish for 15 - 20 seconds until no longer cold.


Strawberry Buttercream Frosting

Ingredients
3/4 cup unsalted butter, at room temperature
1 cup  strawberries
2 1/2 Tbsp milk
2 cups powdered sugar


Directions
In the bowl of an electric stand mixer, fitted with paddle attachment, whip butter on medium-high speed until very pale and fluffy 6 - 8 minutes, frequently scraping down sides and bottom of bowl. OR if you do not have a stand mixer you can use a hand mixer which will only take 8-10 mintues.


You can pulverize the strawberries if you like, or if you want a more strawberry texture use a knife. I find cutting them up into fine peices gives a wonderful texture and a great appeal.


Stir in strawberries, milk, and powdered sugar and whip mixture for 4-5 mintues. Best results if served within the hour.

Reciepe found at www.cookingclassy.com

Thursday, 7 March 2013

Quick & Easy

March break is here, and we all know that if were not busy doing nothing then we should be! here's a ls it of some easy but tasty treats you can dig your teeth into over the break!


Ingredients
1 cup all-purpose flour
2 eggs
1/2 cup milk
1/2 water
2 Tb melted butter


  1. In a large mixing bowl, whisk together the flour and the eggs. Gradually add in the milk and water, stirring to combine. Add the salt and butter; beat until smooth.
  2. Heat a lightly oiled griddle or frying pan over medium high heat. Pour or scoop the batter onto the griddle, using approximately 1/4 cup for each crepe. Tilt the pan with a circular motion so that the batter coats the surface evenly.
  3. Cook the crepe for about 2 minutes, until the bottom is light brown. Loosen with a spatula, turn and cook the other side. Serve hot.
MAKE IT YOURS
You can eat crepes at any time of the day, adding fresh fruits, jam, nutella, or making it into a sand which!


ADD A SMOOTHIE

Smoothies are delish and unique, never making one with the exact same taste again!

When making a smoothie its a good idea to have a base, like ice cream, milk, or yogurt.
Then you can add whatever you'd like, fruits, vegetables, heck you could even throw in a pork chop if you wanted! The best way to get your desired taste is to keep on tasting what you have and figuring out what you would like to taste more of!

My favourite smoothie would defiantly have to be strawberry, ice cream, milk, banana's and anything else yummy! So if any of you takers out there are looking to cheer me up, I'll be waiting with a straw in my hand!
*Don't get me wrong, I've had a couple bad smoothies here and there, it happens! And besides, without the bad you'd never know the good right?*

Wednesday, 6 March 2013

You Are What You Eat

So many people love to bake... or better yet love to eat baked goods. But in all truthfulness you can just be eating piles of sugar. Switching out certain ingredients or buying your produce from different people can make a lot of difference in your baked goods and your diet.


Buy Smart
Anything you can buy local do it! I'm a strong believer in buying local because your not only supporting people in your community but you are not contributing to the lenghty process of creating and shipping food from across the world. As well cutting out on harsh chemicals that are often sprayed on the produce.

Here is a local Kitchener program you can sign up for to receive locally grown foods from farmers around the area!


Eat Smart
Think about it this way, everything you put inside your body becomes your body. In a sense its kind of like putting gas in a car, you put gas in it not toilet water. So put fresh food into your body, not processed.


Fruits over ANYTHING.
Fruits are so easy to be added into a recipe because they are sweet and universally loved.

Alternatives
Use whole wheat flour instead of all-purpose flour. Whole wheat flour contains less sugar, and more fibre. The whole process of making whole wheat flour is less than all-purpose flour, which has to be more refined and processed.


Myths
Brown sugar and white sugar nearly have the same nutritional value. The biggest difference is that the brown sugar gives your baked goods a more brown colour, and more moistness.


Thursday, 28 February 2013

Red Velvet Cupcakes

Looking for delicious fluffy red velvet cupcake, stop your looking now! I`ve tried maybe recipes to get the desired texture I want and this one is by far the best! It left my family hunting me down to make more! Enjoy, and load the icing on!!

Inspiration: Ever since I was young I always had a love for red velvet cupcakes. Whenever I think of them I'm reminded of a time back when I was 7 years old. I was having the worst day a kid could possibly have at that age, not only did my boyfriend of 2 hours dump me, but I lost the favourite blue crayon. As soon as I went home I cried all of this to my parents, who could not find any way to comfort my life crisis. My Mom got an idea and out she ran to the car, which she soon returned with a scretive box. She opened the box, which to my suprise was filled with red velvet cupcakes. To make the day even better, she tripped and the cupcakes flew all over me. My day was not only better, but I ate every single one of the cupcakes, even the ones that were on the floor for more than 10 seconds. What can I say, I was 7 right?!


Ingredients
1/2 cup butter
1 1/2 cups white sugar
2 eggs
1 cup buttermilk(other option listed at bottom)
1 teaspoon vanilla extract
1 1/2 teaspoons baking soda
1 tablespoon white vinegar
2 cups all purpose flour
1/3 cup unsweetened cocoa powder
1 teaspoon salt
Lots of red food colouring
1.Preheat oven to 350 degrees F. Grease one 12 cup muffin pan or line with 12 paper baking cups.
2. In a large bowl, beat the butter and sugar by hand or an electric mixture until fluffy. Mix in eggs, buttermilk, red food colouring(you can skip this step if your okay with brown cupcakes!) and vanilla. Stir in the baking soda and vinegar. Combine the flour, cocoa powder and salt; sift into the batter and stir just until blended. Spoon the batter into prepared pan. Divide evenly so all the cupcakes finish baking roughly around the same time.
3. Bake in the oven until the tops spring back when pressed lightly, roughly 20-25 minutes. Cool on pan or on a wire rack and get ready to frost!


Classic Vanilla Butter Cream Frosting
 Ingredients
1 cup unsalted butter softened
3-4 cups powdered sugar
1/4 teaspoon salt
1 tablespoon vanilla extract
4 tablespoons milk or heavy cream


1. Beat the butter for a few minutes so it is very easy to work with. Add 3 cups of powdered sugar and mix until fully incorporated with the butter. Add the vanilla, salt, and 2 Tb of milk/cream and beat for 3 minutes.
TIP- if your frosting needs a more stiff consistency, add remaining sugar. If your frosting needs to be thinned out, add milk.


When decorating you can apply the icing with a knife or spatula... or pipe it on!! The easiest way to get the icing in your piping bag is to place the bag into a cup. Wrap the bag around the outer edge of the cup and fill it up with icing. These is a hands free and less mess way to get the icing flowing!


EXTRA- Sprinkle a little cinnamon to the finished iced product to give it a little extra flare!


BUTTERMILK
Instead of buying buttermilk for this one recipe you can make your own! Take 1 cup of milk and add 1 tablespoon of lemon juice. Stir and let sit for 5 minutes, and your ready to go!

Wednesday, 27 February 2013

Chocolate Cake

Prefect for birthdays, holiday gatherings or that recent breakup to stuff your face! The best thing about making cake batter is it leaves you so many possibilities such as making cupcakes, making a 1 tier cake, or making a multiple tier cake. Here I made a 1 tier cake, but don`t let that stop you from making a cake as tall as the roof!


Ingredients:
2 cups boiling water
1 cup cocoa powder
2 3/4 cups all purpose flour
2 tsp baking soda
1/2 tsp baking powder
1/2 tsp salt
1 cup butter, softened
2 1/4 cups white sugar
4 eggs
1 1/2 tsp vanilla extract

1.In medium bowl pour boiling water over cocoa and whisk until smooth: let mixture completely cool! If the mixture is still warm and you add it to the other mixtures it will melt your butter, thus creating a less fluffy cake:(!!!! Sift together flour, baking soda, baking powder, and salt. Set aside.
2. In a large bowl, cream butter and sugar together until light and fluffy. Beat in eggs one at a time, and then add vanilla. Add the flour mixture to the butter mixture, alternating with the cocoa mixture. Spread batter evenly between one big pan or numerous smaller ones.
3. Baking for 25-30 minutes, or until a tooth pick comes out clean at 350 degrees F.
SWITCH IT UP:
Add whatever fruits or chopped nuts you`d like! As well, if making a layered cake don`t be afraid to add fruit with the icing and load it on!


And now... the icing!
 Ingredients
1 cup unsalted butter softened
3-4 cups powdered sugar
1/4 tsp salt
1 Tb vanilla extract
4 Tb milk or heavy cream

1. Beat the butter for a few minutes so it is very easy to work with. Add 3 cups of powdered sugar and mix until fully incorporated with the butter. Add the vanilla, salt, and 2 Tb of milk/cream and beat for 3 minutes.
*TIP- If your frosting needs a more stiff consistency, add remaining sugar. If your frosting needs to be thinned out, add milk.*